
And can you guess what it is, from the picture below?

I’ve decided to go DCC for this layout. I’ve already got the point operation bits to operate them on DCC, but I’ll also go for digital train operation. Why, on a small layout:
- Easier wiring for a terminus that will need one or more isolating section on each platform and siding.
- Easier wiring for the traverser/sector plate.
- Easier wiring between baseboards.
- Can keep more than one loco/EMU parked closely on a track.
It will be easy enough (if a little expensive) to convert the stock to DCC, as most are DCC ready, anyhow.
So the picture above shows the two power buses, one for track, one for points. I prefer to keep them separate, so that any electrical problems are easier to locate.
I decided to build the trackwork in-situ, but the board for the station throat on viaduct is not fixed, and I can work on it on the workbench. Here, I’ve trimmed the Finetrax bases to fit the track layout, and glued them down.

A little fiddle was needed to wire up one frog. It lies on a road bridge, so I used solid wire and chased it into the bridge soffit. Not very neat, but will be hidden.
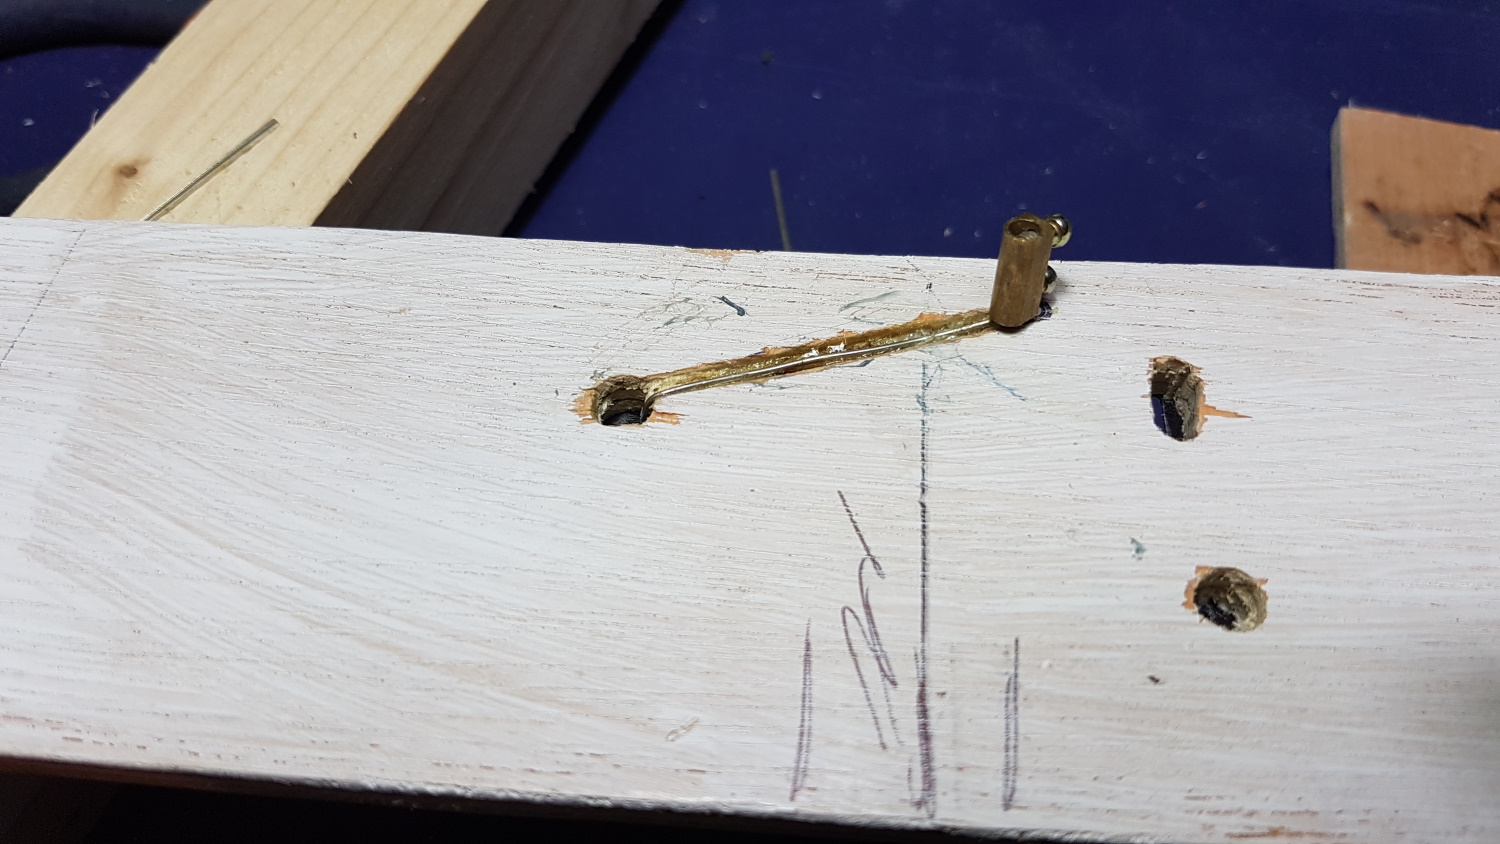
The frogs have a wire for power soldered underneath and fed through the baseboard. I’ve also added the check rails.
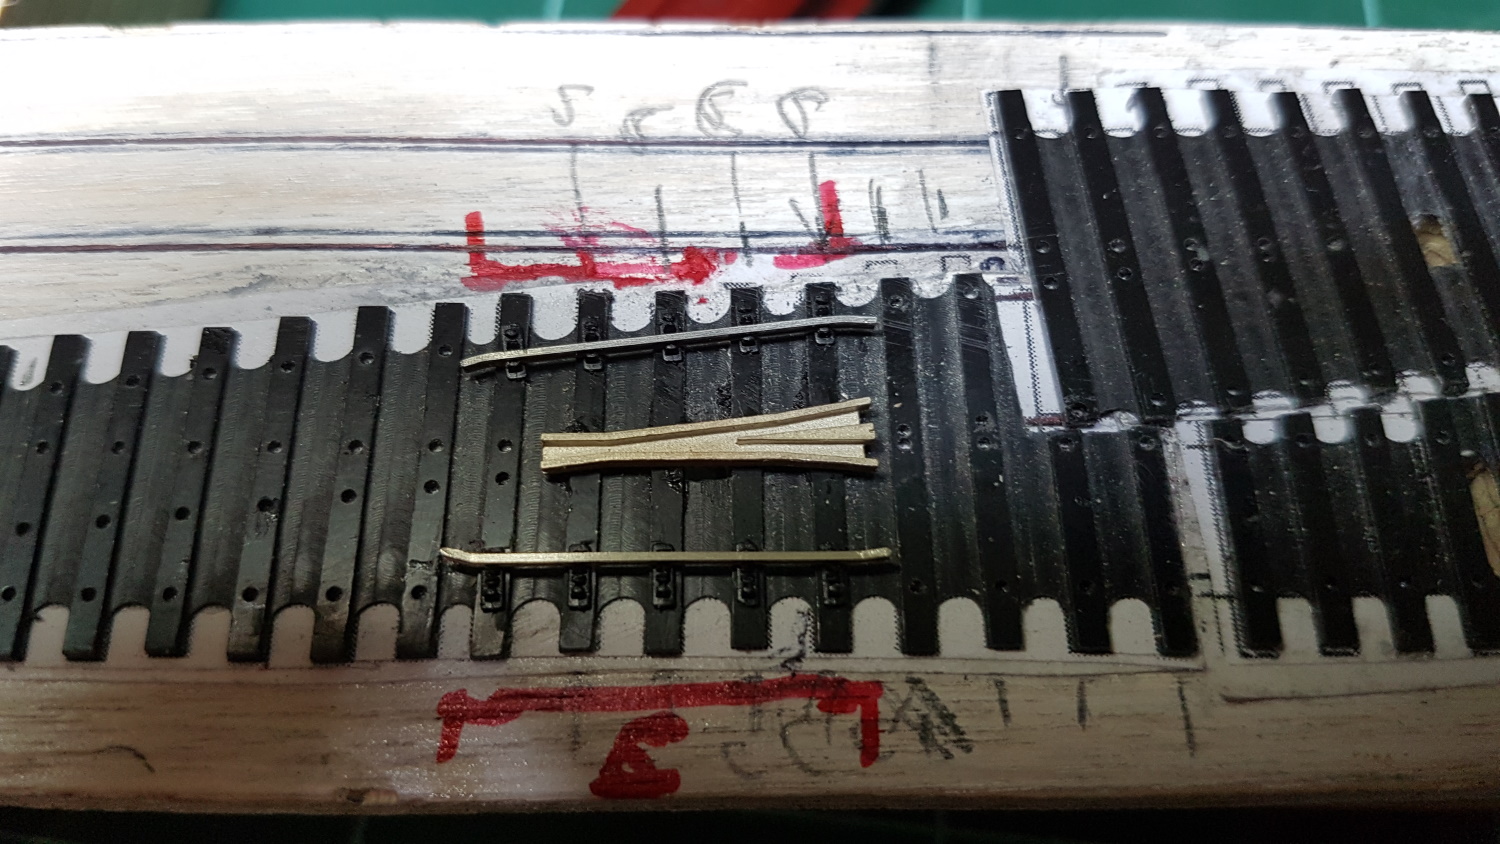
First length of track in place! The end of the board uses some pre-cut copper-clad sleeper sections that I bought from the states a while back. The sleepers are too close, but this track will be hidden by the trackside buildings, and will form a strong end to the board. One reason to lay out the point bases early in construction is to use as much ‘continuous’ rail as possible, and avoid joints and extra droppers being needed. Here, the rail runs from one point up to the frog of the crossover.

A close up of the frog.
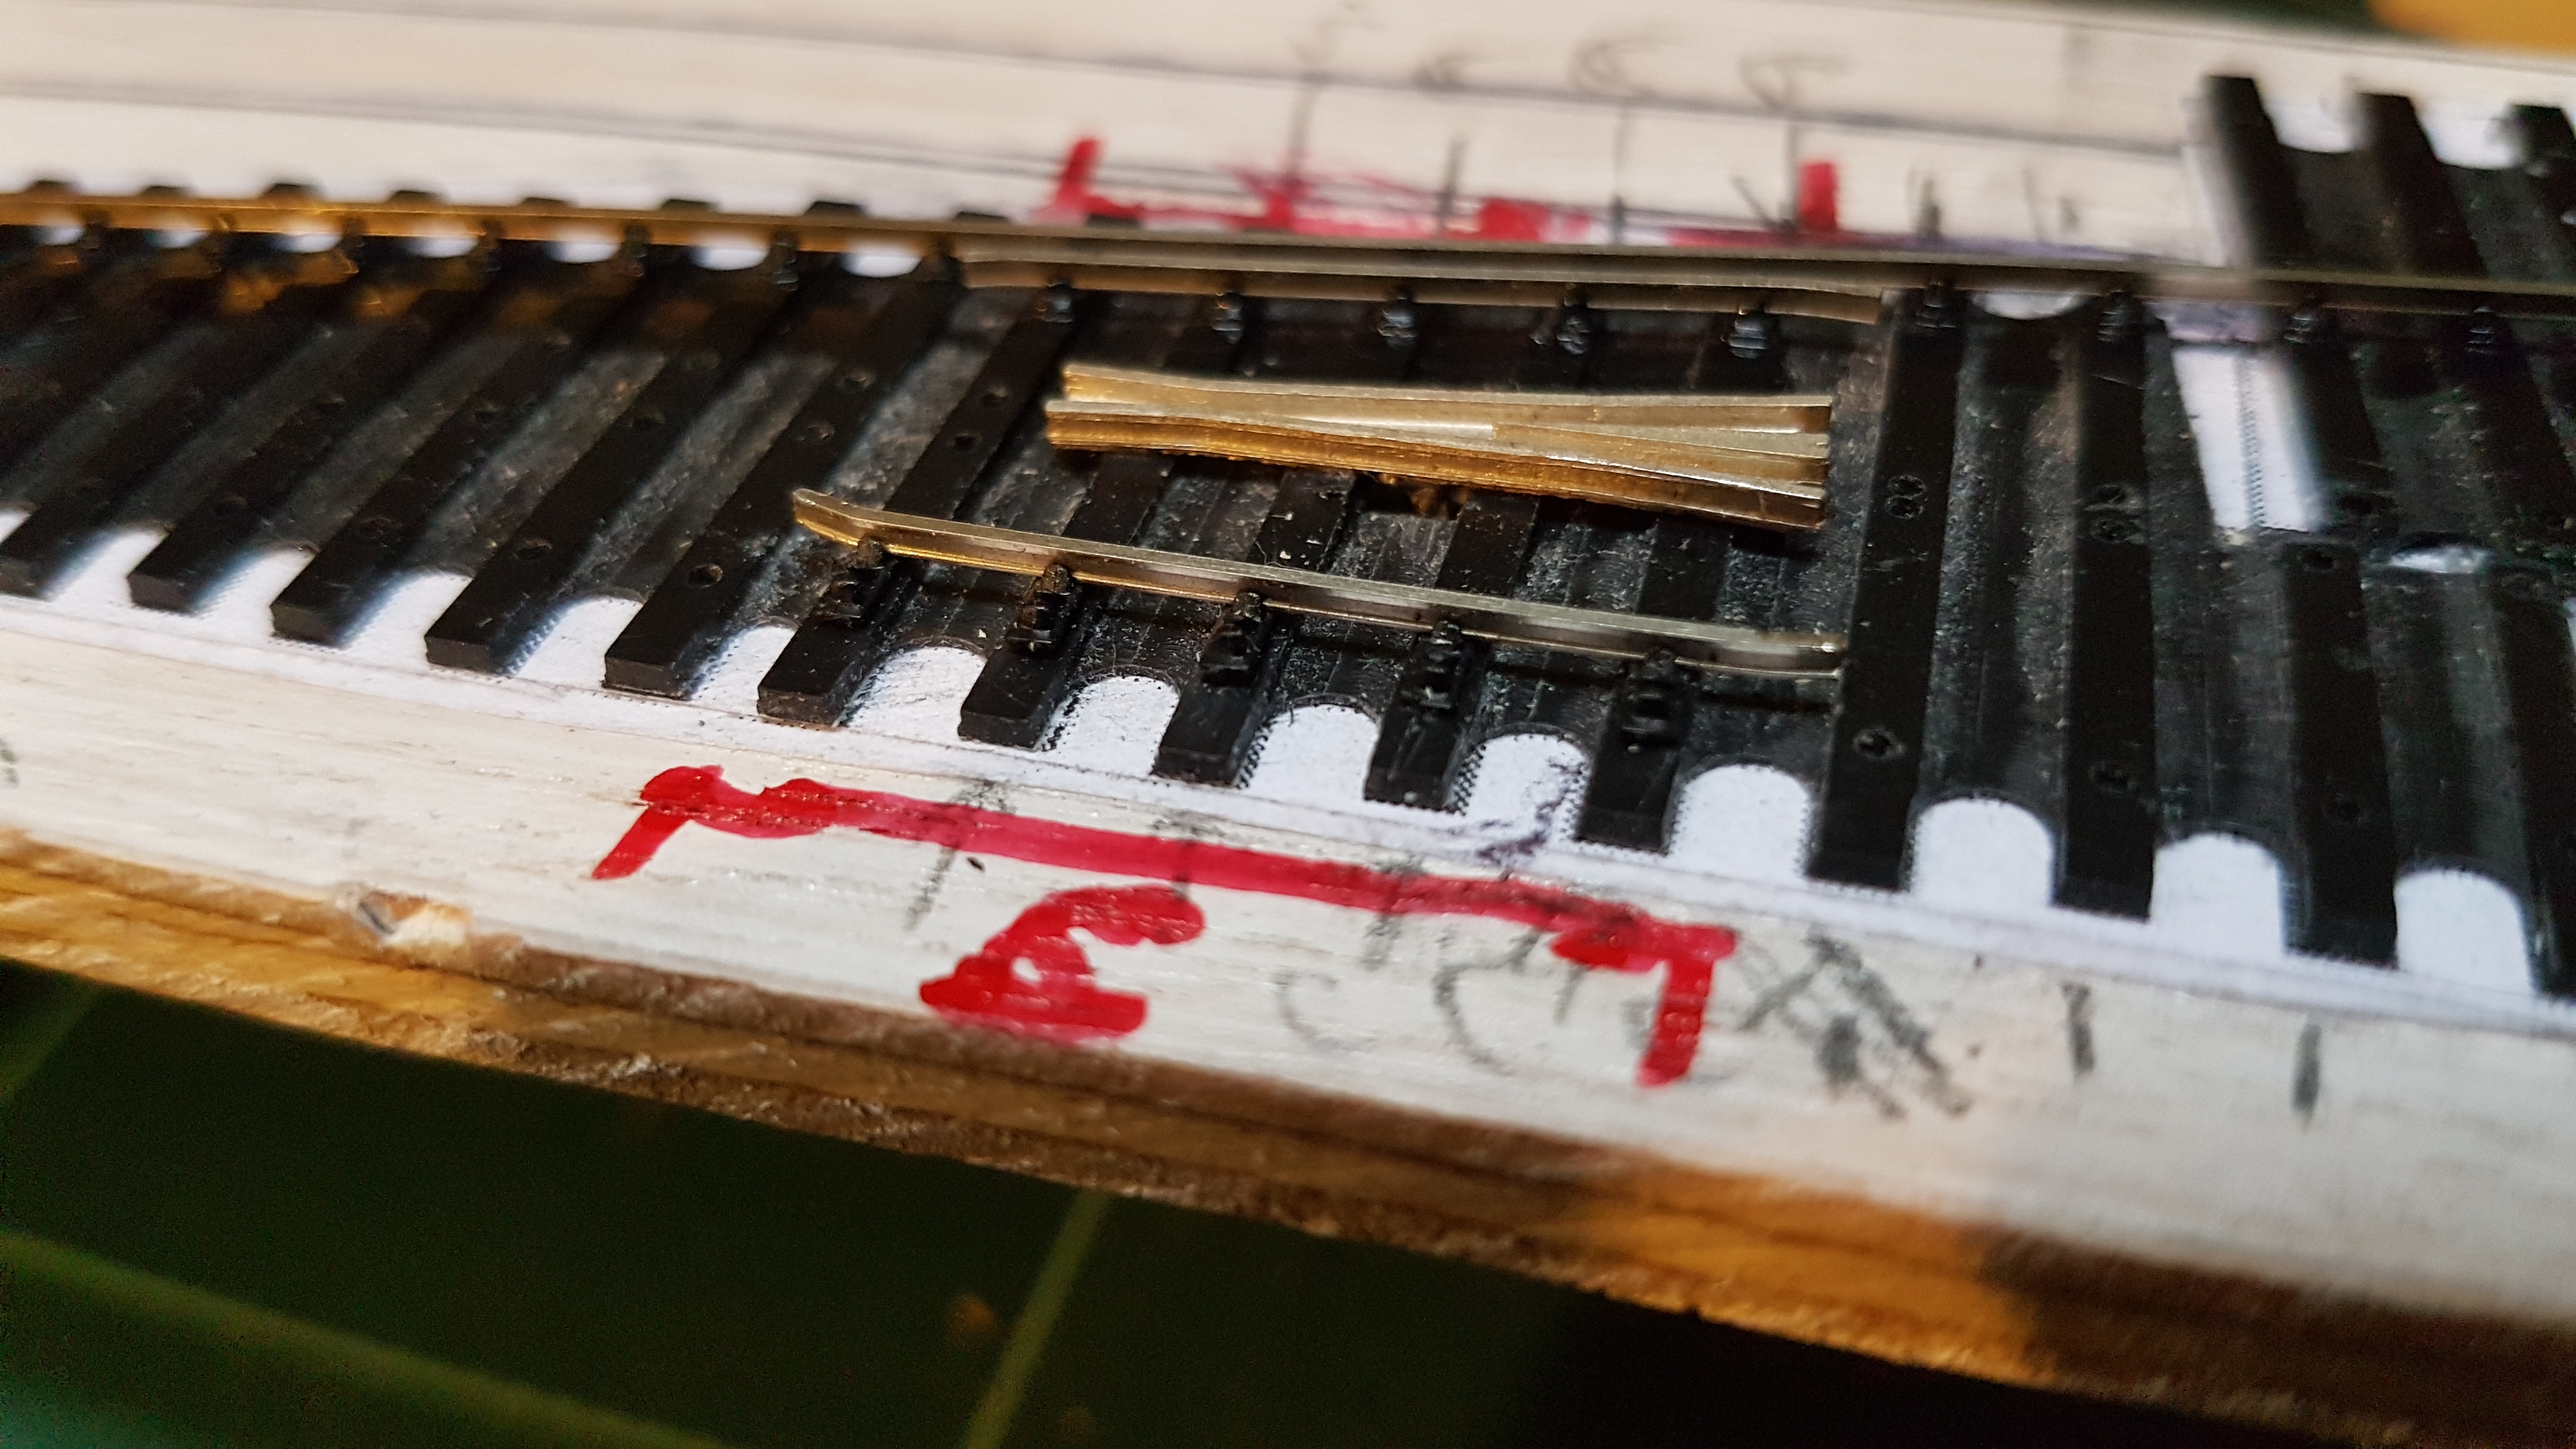
Getting the individual chairs into place is a fiddly job, and I’ve lost a few as they ping across the room. However, like many other jobs, it’s a matter of working out a technique, and using the right tools. I have found it easiest to place one chair at a time, but to thread each one onto a short length of rail and then locate it into the sleeper base. The rail threads through the chairs easily enough, providing one files the rail end slightly to allow it to slip into the chair. After getting the rail in place, a wash of solvent fixes chairs, and actually the rail as well.
Next adventure will be to try and file up a set of point blades.
